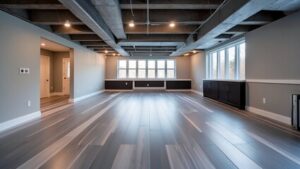
Transforming your basement into a family room, a Netflix-and-chill space or home office is a great way to add value to your house. It can also improve your day-to-day living.
A livable basement starts with creating rooms that are designed for living. Whether that means a TV area to watch movies with the kids, a hang-out space to decompress after work or a bedroom for guests, a well-designed space provides ample room for your family to spend time together. Contact Basement Remodeling Fulshear TX for professional help.
The key to a great basement living space is the right lighting. A recessed system with dimmers and a color-changing feature can set the mood, making your family room ideal for movie nights or just hanging out. A layered approach to lighting can also be used to highlight the ceiling or draw attention to specific features in a room.
If a basement is to be a primary living space, it must meet the requirements of building codes that address egress windows and emergency escapes, ventilation and insulation. A professional contractor can assess a basement’s suitability for habitation and help make the necessary changes to bring it up to code.
Basement living spaces need to be well-ventilated, particularly if they will be used as bedrooms. Good ventilation helps ensure that humidity doesn’t wreak havoc on walls and floors, and makes for a healthier home environment.
In addition to proper ventilation, basements must be properly insulated to keep the temperature consistent and comfortable. A professional insulation installer can ensure the space is well insulated and provide recommendations for a heating, cooling and ventilation system that will maximize energy efficiency.
For multigenerational homes, a well-planned basement can accommodate a full living suite with a kitchenette, bathroom and separate sleeping area. For this type of remodel, it’s important to balance the needs of different ages and life stages by designing spaces that encourage family bonding and support independence.
Bedrooms
Converting a basement into a bedroom is an attractive way to add value and functionality to your home. However, there are a few key elements that you should keep in mind to ensure your lower level sleeping space is comfortable and safe for occupants.
Functionality: Adding a comfortable bed and adequate storage is important, but so are practical features like a convenient electrical wiring system that meets code standards for habitable spaces, a dehumidifier to maintain the ideal humidity levels, and proper ventilation to reduce moisture and prevent mold and mildew. These details make your basement bedroom a pleasant, well-functioning space for occupants and demonstrate that you’ve taken the time to consider a thoughtful use of this ground-level living area.
Natural Light: Adding windows to a basement bedroom is an excellent way to brighten the room and improve overall livability. It’s also crucial to invest in high-quality lighting fixtures that are suitable for a low-light basement environment and can help to illuminate dark corners and nooks.
When it comes to selecting paint colors, light hues are best for a basement bedroom, as they reflect more light and can create a bright and inviting atmosphere. To further brighten the space, consider adding recessed lighting throughout and installing table, floor, or wall sconces. These decorative touches are a great way to add visual appeal and complement a variety of design styles.
Offices
Whether you work from home or just need a quiet space to get your tasks done, a basement office is a great way to increase the functionality of your house. You can craft a stylish workspace with a desk, chair, bookshelves, and more to create a comfortable home office that’s both productive and visually appealing.
If your basement has a window, take advantage of it by placing your desk or table near it. Taking in natural light can boost your productivity and enhance your mood throughout the day. A cozy armchair or sofa can also be a relaxing spot to unwind during breaks.
The key to a functional home office is adequate storage solutions, so be sure to include plenty of cabinets, shelves, and other shelving in your basement remodel. A basement office also needs ample lighting, which is typically easier to achieve with natural light. Opt for bright white or other neutral tones to make the area feel more inviting. Proper insulation will help you maintain a comfortable temperature in the basement, too.
Hiring professional contractors for your basement remodeling is a smart choice, as they have the skills, tools, and insurance to ensure your project is done correctly and up to code. They can also help you stay within your budget by recommending the most cost-effective upgrades for your space.
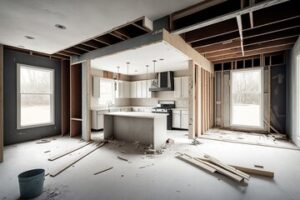
If you’re thinking about basement renovations, start by getting in touch with a design-build team to see how they can help. They can offer you expert advice and a free consultation to determine if your basement is a good fit for the kind of space you want to create. If it is, the preparation phase will begin with an inspection and cleanup before moving on to framing, electrical and plumbing rough-ins, drywall installation, and flooring.
Bathrooms
Adding a bathroom to your basement is an excellent way to increase its usable square footage. Having an extra bath is also convenient if you want to convert your basement into a guest suite, home gym or a playroom. Plus, a well-executed basement remodel with full bathroom increases your home’s value.
If you’re looking for ways to add a little luxury to your basement bathroom, try out high-end materials like wood-look planks or glass tile. These materials are ideal for high-moisture areas and add a custom, designer feel to your space.
Another easy way to add style to your basement bathroom is by using bold wallpaper. The team at Construction 2 Style used dramatic dark floral wallpaper in this bathroom to make a statement.
Basement bathrooms are also a great spot to incorporate natural elements, especially greenery. Potted plants and succulents add a pop of color and offer air-purifying benefits, even in low-light basement settings. To make sure your plants stay healthy, choose plant varieties that thrive in low light.
A basement is a great place to create a multifunctional family room for games, movie nights and hanging out as a group. Add comfortable seating, a television and lots of custom storage for toys and board games to create a cozy place to relax and unwind.
If you have kids, consider creating a dedicated children’s playroom or bunkroom. Include a television, plenty of storage for toys and games, and a soft lighting system to create an inviting space that’s perfect for relaxing and playing. Finished basements can also be a great spot to create a home gym with exercise equipment, mirrors and rubber flooring.
Storage
Many families rely on their basements as a catch-all for tools, sports gear, out-of-season clothing and miscellaneous clutter. Without organization, this space can quickly become a nightmare to navigate. A few key organizing tips can help you reclaim your basement and put it to good use.
Start by decluttering and sorting items into categories. Then, decide what you can live with and what needs to go. Once you’ve purged unnecessary items, put the remaining belongings into organized storage. elfa shelving is ideal for this, as it’s durable, weatherproof and easy to label. The homeowner who used these ideas for her basement says she and her family “live out of our basement every day, and it’s nice to know we can easily find what we need!”
Organize your home office or work station with an array of stylish storage solutions that coordinate with the rest of your decor. This built-in cabinet is a great example, with open and closed options to suit various storage needs. Open shelving is perfect for displaying knickknacks and keepsakes, while frosted glass lets light shine through to keep the space from looking too bulky. Closed base cabinetry hides pesky electronic cords and other unsightly items.
Before starting any renovations, be sure to set a realistic budget and timeline for your project. It’s also important to consult with remodeling professionals for expert advice about the feasibility of your project and potential hidden costs, such as unforeseen structural issues or code violations. And finally, don’t forget to factor in any professional design fees that may be necessary to bring your vision to life. These expenses can add up quickly, but they’ll be worth it in the end when you see the return on your investment and the added value to your home.